Combining external data with Experiences
Overview
Contentful is typically used as one among multiple data sources in a user’s systems. In a given experience (usually a full page), you might find youself pulling in and mixing together information from both Contentful and external data sources such as Product Information Management (PIM) systems, Digital Asset Management (DAM) systems, or similar systems for enhancing the user experience while preventing maintenance of the same data (e.g., pricing data) in multiple places.
This comprehensive guide demonstrates how to integrate external data sources with Contentful Experiences, showing you how to create custom components that can fetch and display data from third-party APIs while maintaining optimal performance through server-side rendering.
Architecture overview
The solution follows a hybrid approach that combines server-side and client-side data fetching to provide optimal performance for end users while maintaining a smooth editing experience in Contentful Studio.
Key components
- Custom component in Studio with a variable for external system ID (e.g., PIM ID or SKU)
- Server-side data extraction that analyzes the experience structure and fetches external data
- Client-side fallback API for editor preview mode
- React context for passing prefetched data to components
- Caching layer to optimize performance and reduce API calls
Data flow
- End-user experience:
- Experience is fetched on the server side
- Product IDs are extracted
- External data is fetched
- Data is passed to components via context
- Editor experience:
- Experience is passed from Studio
- Components fetch data on the client side via API route
- Data is displayed with editor context
Prerequisites
Before starting this implementation, make sure you have:
- A Next.js project with App Router
- Contentful Experiences SDK installed (
@contentful/experiences-sdk-react) - Access to an external API (we’ll use Shopify’s Mock Shop as an example)
- Basic understanding of React Server Components and client components
- React Query by TanStack (
@tanstack/react-query) for client-side data fetching
Understanding the Mock Shop integration
The example uses Shopify’s Mock Shop as a demonstration PIM system. This service provides:
- GraphQL API: A complete GraphQL endpoint at
https://mock.shop/api. - Sample product data: Pre-populated with realistic product information.
- Product IDs: Simple numeric IDs that are converted to Shopify’s Global ID format (e.g.,
gid://shopify/Product/7982905098262). - Rich product data: Including titles, descriptions, price ranges, and featured images.
Available product IDs for testing
You can explore the full example product catalog by visiting the Mock Shop Playground and running queries such as the following.
Setting up the project structure
The example implementation follows this directory structure:
Creating the PIM service layer
The example uses a dedicated service layer to handle all interactions with the external PIM system. This approach provides better separation of concerns and makes the code more maintainable. The typing is based on Mock Shop’s response structure, and you’ll need typing according to the external system you’re connecting to.
Creating the product extraction utility
The product extraction utility analyzes the experience structure and extracts all external system IDs that need to be fetched.
Building the API route for client-side fetching
In editor view, the experience does not get fetched on the server-side as for end users but gets communicated into the canvas view by Contentful instead. The whole experience will be null and fetching is a no-op function. So for editor mode, we need a client-side API route that can fetch individual product data on the fly. This ensures the editing experience matches the end-user experience.
This simple API route leverages the existing PIM service to fetch product data. The service takes care of getting the required data from the third-party system, including potential authentication, proxying, other security measures, and data transformation, making the API route clean and focused.
Creating the custom components
The example includes two custom components: a PriceComponent for displaying product prices and a ProductComponent for displaying full product information. Both components handle both server-side prefetched data and client-side fetching for editor mode.
The purpose of having a Price custom component and Product custom component is to demonstrate that multiple custom components can be fed by the same external data.
Utility types
In the following components, we’re using a small utility type that applies to all Experience components and gets populated by the Experiences SDK automatically.
Price component
Rendering
Custom component registration
Product component
The product component utilizes the price component internally and displays additional data such as product titles and images.
Rendering
Custom component registration
Setting up the React context
The React context allows us to pass prefetched data from the server to client components efficiently.
Implementing the page component
The page component orchestrates the entire flow: fetching the experience, extracting product IDs, fetching external data, and rendering everything.
Update your src/components/Experience.tsx to handle the editor mode:
Registering the custom component
Finally, register your custom component with the Experiences SDK.
Testing the implementation
Testing end-user experience
To test the end-user experience:
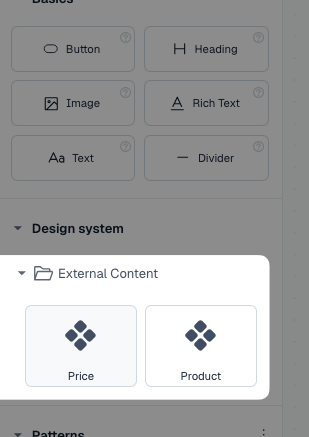
- Create an experience in Contentful Studio.
- Add the “Price” or “Product” component to your experience from the “External Content” category.
- Set a valid product ID (see Mock Shop examples).
- Publish the experience.
- Visit your site to see the product data rendered on the server-side.
The components will automatically:
- Extract the product ID from the experience structure
- Fetch product data from Mock Shop using GraphQL
- Display the information with proper formatting
In editor mode, you’ll see:
- Real product data fetched from Mock Shop
- Editor overlays showing the product ID and title
- Loading states while data is being fetched
- Fallback messages if products aren’t found

Caching considerations
The implementation includes several caching strategies:
Server-side caching
- Next.js fetch caching: External API calls use Next.js built-in caching
- API route caching: Client-side API routes include appropriate cache headers (if meaningful depending on the kind of data)
Client-side caching
- React context: Prefetched data is passed via context to avoid re-fetching
- Component state: Components cache fetched data in local state
Security considerations
API security
- Rate limiting: Implement rate limiting on your API routes (to prevent facilitating scrapers accidentally)
- Input validation: Validate all product IDs before making external requests
- Error handling: Don’t expose sensitive error information
Conclusion
This implementation provides a robust solution for integrating external data sources with Contentful Experiences. The hybrid approach ensures optimal performance for end users while maintaining a smooth editing experience. The modular architecture makes it easy to extend and adapt for different external systems and use cases.
Key benefits of this approach
- Performance: Server-side rendering with prefetched data
- Flexibility: Works with any external API
- Editor experience: Seamless editing with real data preview
- Scalability: Efficient caching and parallel data fetching
- Maintainability: Clean separation of concerns
For more advanced use cases, consider implementing additional features like:
- Real-time updates: WebSocket connections for live data
- Batch operations: Optimized bulk data fetching
- Data transformation: Custom data mapping and formatting
- Analytics: Tracking external API usage and performance